在嘗試完成這項目標的過程當中,遇到了不少困難,但是感謝網路上許多貴人相助,才讓我順利完成。
我只是個linux的新手,簡單分享一下這次的經驗,若有錯誤或不足之處,還請各路高手指教。
1.首先先下載Cisco VPN Client for Linux
http://projects.tuxx-home.at/ciscovpn/clients/linux/
2.再下載修正Patch
http://lamnk.com/download/vpnclient-linux-2.6.31-final.diff
3.將下載回來的Cisco VPN client解壓縮
@@所有下載檔案我都讓它存在預設路徑 /Downloads,所以解壓縮後的東西我也放在Downloads下面
@@把修正Patch檔案放入解壓縮後的資料匣內,後面比較方便安裝
4.打開附屬應用程式裡的終端機
5.輸入以下指令
cd Downloads
cd vpnclient
patch < ./vpnclient-linux-2.6.31-final.diff
6.請再開一個新的終端機,輸入以下指令
sudo sed -i 's/const\ struct\ net_device_ops\ \*netdev_ops;/struct\ net_device_ops\ \*netdev_ops;/' `find /usr/src -name netdevice.h`
@@sudo指令系統會跟你要密碼,請給它你的開機密碼就對了。
@@步驟六是我歷經多次失敗後上網找到的指令,到底是在幹嘛我完全不知道,但是沒打這串,安裝就不會成功
7.在終端機輸入 sudo ./vpn_install
8.跑玩安裝程序後,就是要建立連線資料檔案啦!
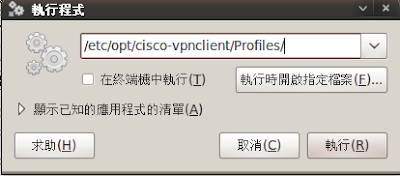
首先到 /etc/opt/cisco-vpnclient/Profiles/ 目錄下,會看到一個檔案叫作 sample.pcf,按右鍵選擇以其他程式開啟,選用文字編輯器開啟。
@@由於Ubuntu9.10我才摸了三天,所以很多東西我都搞不懂,上網爬文說Profile檔案放在 /etc/opt/cisco-vpnclient/Profiles/ 但是我就是找不到這個目錄,所以我都是用Alt+F2叫出執行程式,然後直接打路徑來開啟我要的目錄。

9.內容如下,請依照自己公司的內容輸入,完成請後存檔。 <>內的文字是我的說明,不用輸入
[main]Description=VPN Client for Ubuntu 9.10 <說明:這是內容標示可隨意輸入>
Host=1.1.1.1 <說明:公司VPN Server 的IP>
AuthType=1 <說明:預設值,無須更動>
GroupName=abcd <說明:公司VPN的Group Name>
EnableISPConnect=0 <說明:預設值,無須更動>
ISPConnectType=0 <說明:預設值,無須更動>
ISPConnect= <說明:預設值,無須更動>
ISPCommand= <說明:預設值,無須更動>
Username=wahaha <說明:你的VPN帳號>
SaveUserPassword=0 <說明:以下都用預設值即可,無須更動>
EnableBackup=0
BackupServer=
EnableNat=1
CertStore=0
CertName=
CertPath=
CertSubjectName=
CertSerialHash=00000000000000000000000000000000
DHGroup=2
ForceKeepAlives=0
GroupPwd=
enc_GroupPwd=
ISPPhonebook=
UserPassword=
enc_UserPassword=
NTDomain=
EnableMSLogon=1
MSLogonType=0
TunnelingMode=0
TcpTunnelingPort=10000
SendCertChain=0
PeerTimeout=90
EnableLocalLAN=0
eMSLogon=1
MSLogonType=0
TunnelingMode=0
TcpTunnelingPort=10000
SendCertChain=0
PeerTimeout=90
EnableLocalLAN=0
10.開啟一個終端機,輸入
sudo /etc/init.d/vpnclient_init start
11.最後輸入
sudo vpnclient connect sample
Cisco Systems VPN Client Version 4.8.01 (0640)
Copyright
Client Type(s): Linux
Running on: Linux 2.6.31-16-generic #53-Ubuntu SMP Tue Dec 8 04:01:29 UTC 2009 i686
Config file directory: /etc/opt/cisco-vpnclient
Enter a group password: <說明:請輸入貴公司的Group password>
Initializing the VPN connection.
Contacting the gateway at 1.1.1.1
User Authentication for abcd...
The server has requested the following information to complete the user authentication:
Username [wahaha]: <說明:按enter即可>
Password []: <說明:輸入你的密碼>
Authenticating user.
Negotiating security policies.
Securing communication channel.
Your VPN connection is secure.
VPN tunnel information.
Client address: 10.1.1.1
Server address: 1.1.1.1
Encryption: 168-bit 3-DES
Authentication: HMAC-SHA
IP Compression: None
NAT passthrough is inactive
Local LAN Access is disabled
@@sudo vpnclient connect
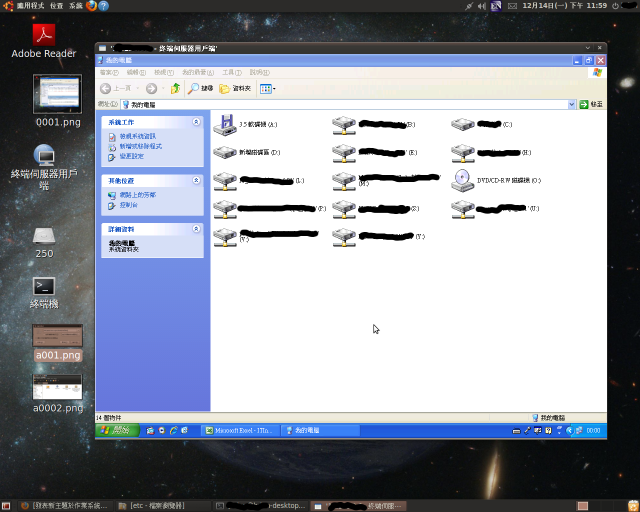
12.恭喜你,VPN已經連線啦!!最後用終端伺服器用戶端程式即可遠端連回辦公室的Windows XP啦!!

========================
來源
http://www.mobile01.com/topicdetail.php?f=300&t=1345538&m=s&s=11&b=7&r=2&last=16422969

沒有留言:
張貼留言